Your ATL ToolBank’s fab new intern, Bernie Atkinson, has already mastered the warehouse – so we’ve set her loose with her first #DIY blog! Check out her adventures in compost below and stay tuned for more of Bernie’s Adventures in Tool Land…
Super Easy. Super Stylin’. How to MakeYour Very Own Compost Bin Out of Pallets!
We are fast approaching the end of summer here in Georgia, and with that, gardening season is coming to a close. That doesn’t mean, though, that you can’t do something to make next years’ plantings even better, starting right now. If you don’t already have a compost bin working in your backyard, fall is a great time to start it off. The last of this years’ grass clippings mixed with some raked up leaves and kitchen scraps make up one of nature’s finest soil amendments so that your veggies can grow bigger, more productively, and, if you’re doing it right, cheaper.
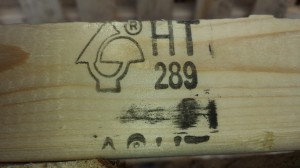 Pallets are a great source of upcyclable wood, and can frequently be found for free on Craigslist or even on the side of the road. Be sure, though, that the pallets you have are safe to be used for vegetable gardening. Look for an “HT” marking somewhere on the wood. This stands for “Heat Treated”. The other treatment used on pallets is Methyl Bromide, marked MB, which is a pesticide and fumigant that could potentially leak into your compost. If a pallet is unmarked, it is best to fear the worst and not use that pallet for a food contact application.
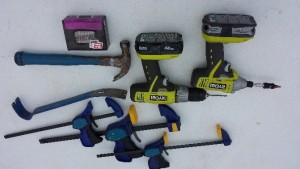 For this project, we will be using the following tools and materials:
- Hammer
- Wonder Bar
- Cordless Screwdriver
- Drill Bit and Phillips Head Bit
- Clamps
- Saw
- Safety Goggles
- 2” Screws
- Four Pallets of the Same Size
We also enthusiastically recommend a hardy pair of work gloves and a bucket for catching nails.
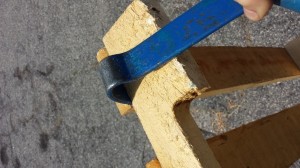 Step 1: Remove the bottom slats
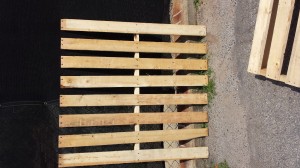
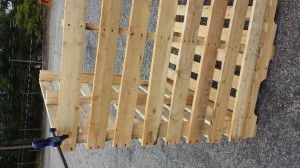
Start by removing the bottom slats of the pallet using the hammer and wonder bar. A few gentle taps with the hammer should allow you to finagle your pry bar in and start getting some work done.
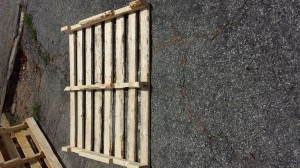
Remove all three bottom slats from all four of your pallets, pull any nails still left in the stringers, and your pallet should look something like this:
 Step 2: Remove the stringers from two of the pallets
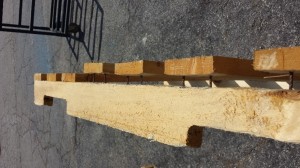
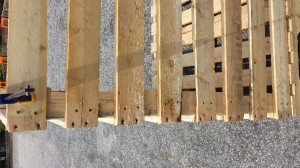
Next, we are going to pull the two outside stringers off of two of the pallets. Using the same hammer and pry technique we used in step one, start loosening the slats from the 2X4’s.
To get the nails out of the slats with as little effort as possible, tap each board with the hammer. This pushes the nail heads out of the wood and allows some purchase for your hammer to pull them out.
At this point, two of our pallets should look like this:
 Step 3: Cut a pallet in half
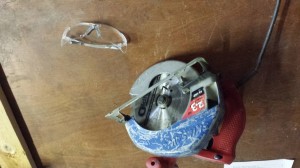
Next we are going to take one of the pallets we just created and cut it in half. You can use a lot of different kinds of saw to do this, so long as it can cut a flush line through a 2X4 against a slat. We used a circular saw.
Step 4: Screw it all together
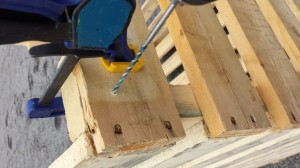
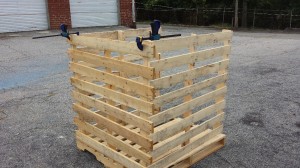
Take one pallet with three stringers and one pallet with just the middle stringer and stand them up to make a corner. Square up the edge and 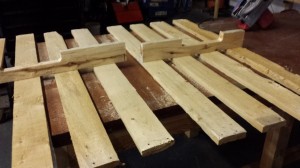 clamp the pallets together. (We had to set them on another pallet to give us a flat working surface, but it isn’t attached.)
Starting at the top, begin predrilling holes two per slat. If you try to screw into the pallets without predrilling, the wood will split. When you’re done predrilling, go back through, this time with screws.
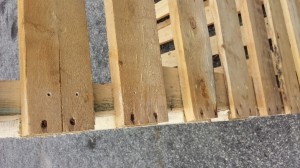
Join another three stringer board to the other side and repeat the predrilling and screwing steps.
 Finally, screw the half pallet to bottom half of the front of the bin.
That’s it! Put the bin somewhere in your yard and start filling it. With the occasional turn with a pitchfork, you should have a heaping helping of loamy, nutrient rich compost to add to your gardens next spring.

 With a goal to install 6,500 new fire alarms across Georgia by July 1, 2016, the Atlanta Red Cross knew exactly who to call – your favorite, friendly tool lenders!